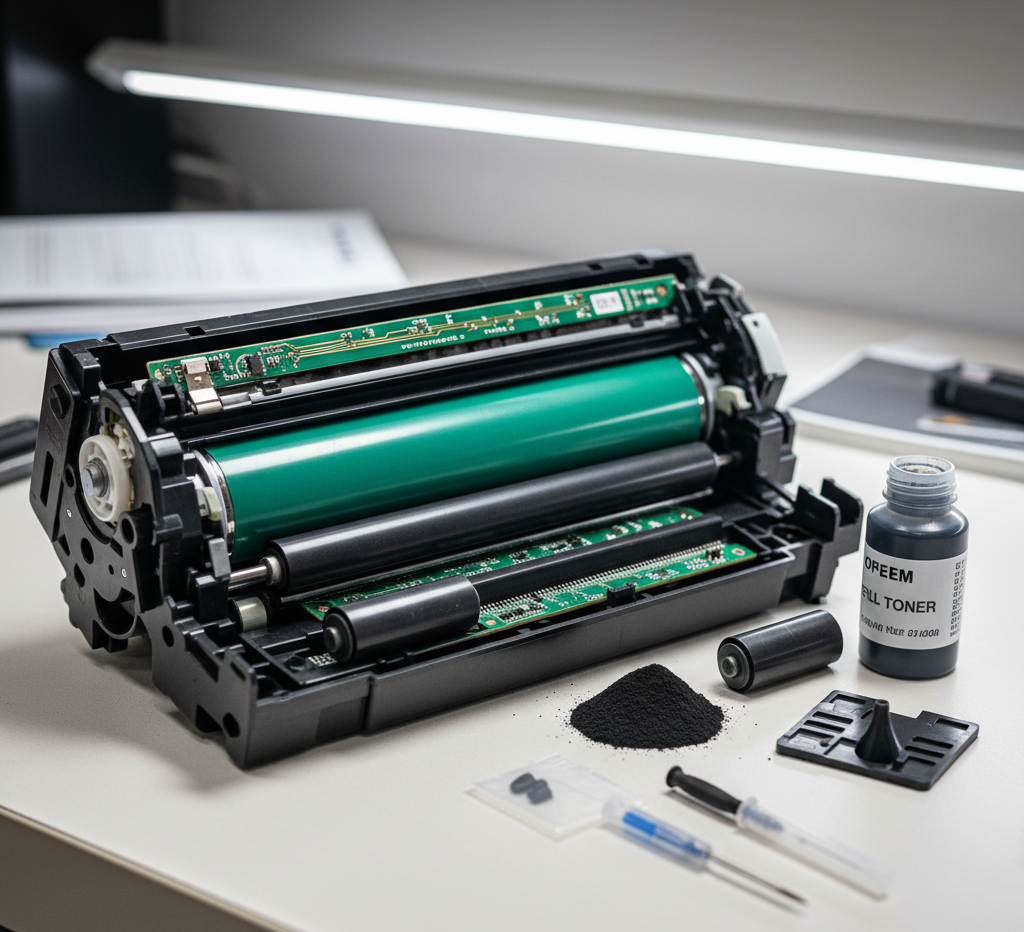
A toner cartridge is a very important part of a printer. It is very significant to the working of a laser printer. Purchasing one can however prove very expensive.

Finding the right model may also be a daunting task. As a result, many people tend to opt for refills. One thing to note about the same is that toner cartridges are very delicate.
And there is a slight chance you might miss.
The recommendation often given is to leave the task to a trained professional. But really there is no need for that if you can as well know how to go about it?
Below are the three most common methods used to refill toner cartridges. The guide will surely help you avoid the mess.
But first, let’s start with a typical framework of a toner cartridge then look at the refill kits and later have the common practical & procedural approaches.
Most toner cartridges bear integrated compartments that serve to hold the toner, control it as well as monitor the circuitry
They also feature large drums and one or more smaller rollers. Some cartridges have additional features, but most of them bear the top and bottom body parts.
Original Equipment Manufacturer (OEM) toner cartridges are hard to refill. They are by design not supposed to be refilled by persons who are not professionals.
However, as earlier indicated, this is not impossible. Refill kits vary in sizes, types and models. Also, some are provided with toners and tools necessary for opening and cleaning.
On the other hand others are accompanied by the toner and a syringe.
It is important therefore to look for the refill kit based on the model and type of toner cartridge. It is crucial to specify for instance, if you are looking for a refill kit for a HP Laser Jet 5.
Other tools you need to try and have include: screwdriver, cleaning supplies as well as rubber gloves.
The Toner Refill Approaches
1. Full Service Method
Begin by disassembling the toner cartridge. While at it, wear rubber gloves. Each part of the body should have its own set of screws. Store the screws well after removing them.
Pull the plates of either sides of the toner cartridge straight off. Jiggle the two halves of the cartridge gently back and forth to pull them apart.
Remove the large colored drum from the now open body then pull out the smaller roller behind it. This should reveal a tinny thin strip of metal.
Remove the screws before lifting the strip of metal out with the relevant tool, often a needle-nose plier or tweezers. You should take care not to bend the metal.
At this point, the old toner should be visible in the partition under the strip. Dumb the toner out and clean using canned air or a spirit-soaked piece of cloth.
Then replace the piece of metal and the cartridge rollers in the correct order they were before disassembling. This should come after carefully cleaning all the other components.
Also, cleaning the drum properly will contribute to improved performance.
Next, remove the thin roller on the other half of the cartridge. This is such that it is much easier to dump the toner powder from the body and to clean out the compartment with the air can.
Again, this will reveal a narrow outlet next to a familiar-looking metal strip. The opening leads to a toner reservoir.
You should then be able to pour the powder into the gap using the included funnel. Feel free to make a panel funnel in case one was not included in the refill kit and use it to direct the toner powder.
Fill the reservoir until it begins to overflow. Move the nozzle from one side to another to make the toner even.
Next, clean the roller, snap it back into place, and thoroughly wipe down the surrounding area to remove any excess powder.
Finally, reassemble the body parts and end the plates. All parts should snap back into place smoothly with minimal force.
Then, clean stray toner discovered in the crevasses and reinsert back all screws. Once the toner cartridge is reassembled, ensure that the drum rotates smoothly.
2. Quick Puncture Method
Some refill kits are designed to let the user refill his/her toner without even disassembling the cartridge. They include a special puncture bit that can be placed in a common drill even though some people use soldering irons
With these tools, the user must make a hole toward the rear of the cartridge where the toner reservoir is.
After the hole is made, the toner powder should be poured straight in with the funnel. Finally about this, the opening should be sealed with duct tape or a purpose-made plug.
Shaking the cartridge from side to side helps distribute the toner evenly.
3. Toner Refill Level Circuitry
Some cartridges have an additional refill step. This is the level circuitry. It comes after either of the steps above.
Some devices have toner level-sensing chips, users often have to slide the old chip out of its mount and replace it so that the printer recognizes that the cartridge is full.
Perhaps next time you call in the expert, stand by, and with this in mind, you won’t have to call him/her again and by extension you will without a doubt save some bucks
But until then enjoy your printing experience and of course we wish you all the best.
