Why Your Prints Look Faded or Streaked
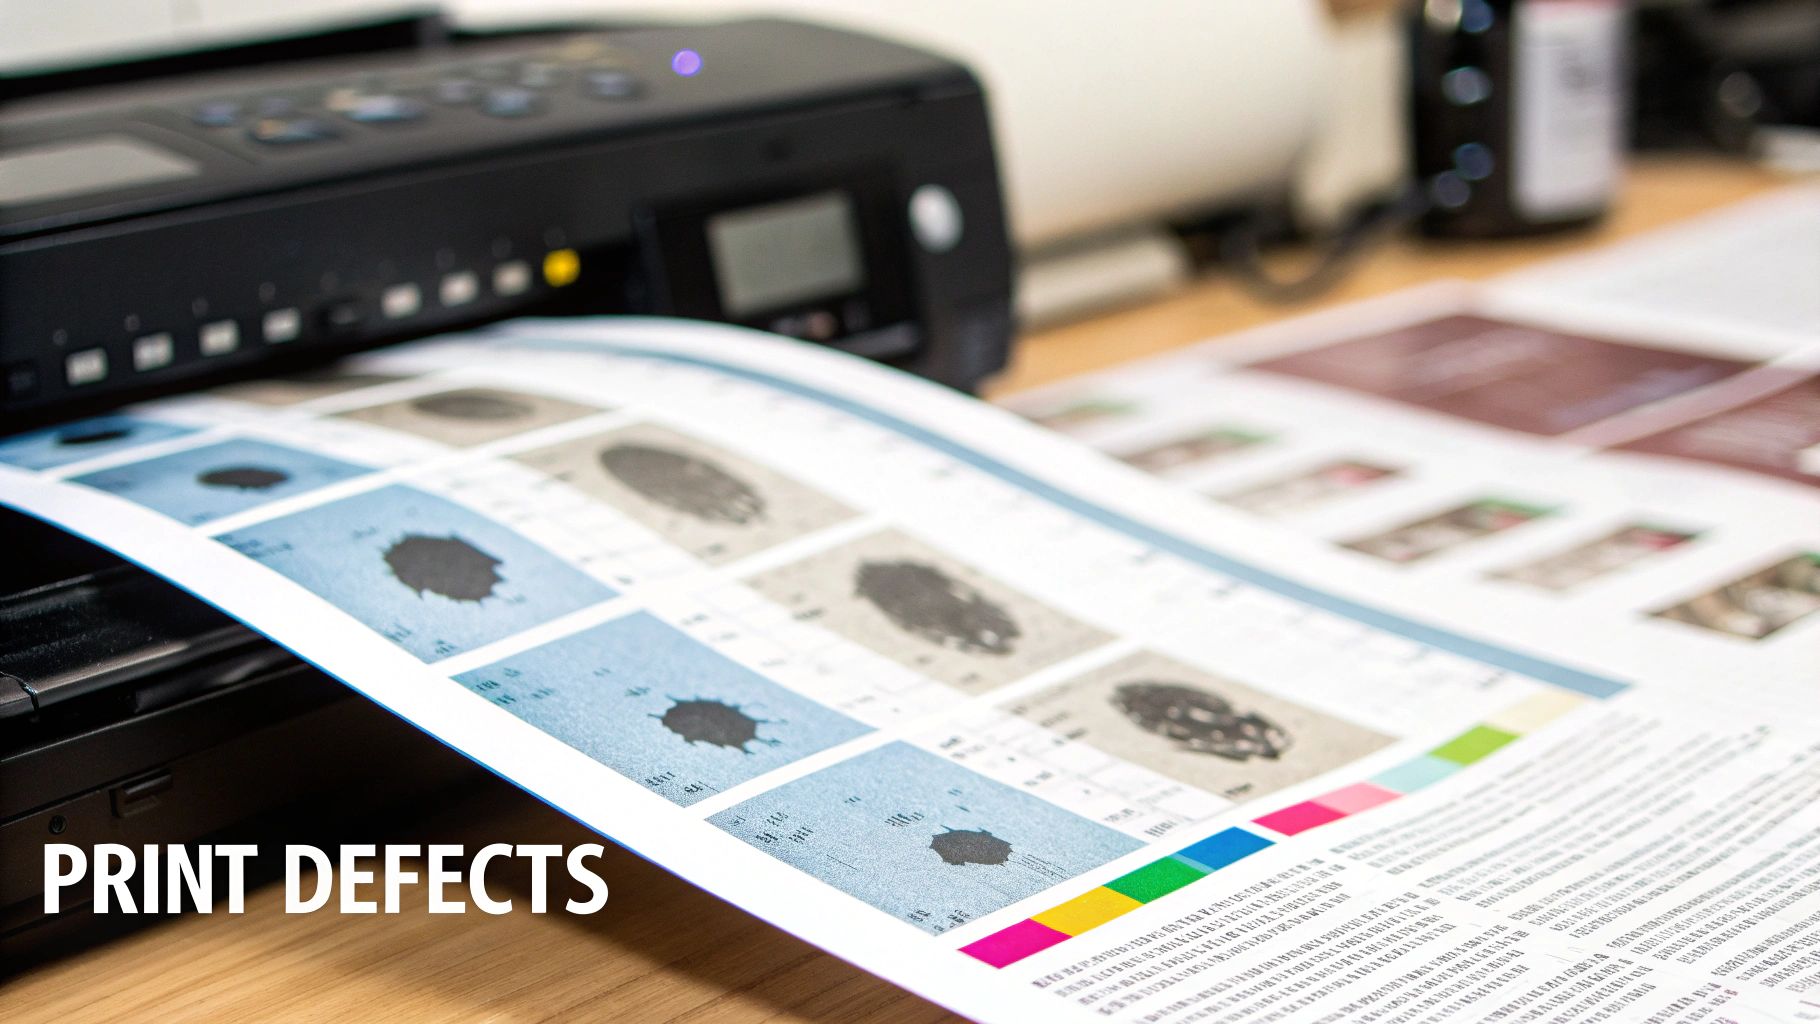
If your printed pages show faded text, smudges, repeating dots, or ghosted images, your printer drum is likely the culprit. A worn drum can no longer hold a strong electrical charge, causing toner to transfer unevenly.
This issue is extremely common—a fresh toner cartridge won’t fix it because the drum is a completely separate component.
Printer Drum vs. Toner: What’s the Difference?
Your toner cartridge stores and dispenses powdered toner.
Your drum unit transfers that toner onto the page using static electricity.
Both wear out, but the drum typically lasts 12,000–30,000 pages, depending on your printer model.
Replacing the drum is almost always cheaper than buying a new printer, making it a smart, cost-effective repair.
Signs Your Printer Drum Needs Replacing
Clear Drum Failure Symptoms
-
Repeating black dots at the same spot on every page
-
Vertical gray streaks or scratches
-
Ghosting (faint duplicated images or text)
-
A 5% or lower drum life warning on your printer’s Supplies Status page
Low Toner Symptoms (Not Drum-Related)
-
Overall faded or “washed out” pages
-
Blurry text
-
Random blank patches
-
“Low Toner” alert on screen
Many people waste money by replacing toner first. Instead, print a Configuration or Supplies Status page from the printer menu to confirm the drum’s remaining life.
Drum Replacement vs. Buying a New Printer
| Option | Cost Range | Replacement Frequency | Ideal Scenario |
|---|---|---|---|
| Drum Replacement | $50 – $200 | Every 10,000 – 50,000 pages | Your current printer is reliable, and you want the most cost-effective solution for print quality issues. |
| Buying a New Printer | $100 – $1,000+ | Every 3-5 years | Your old printer is failing, lacks modern features (like Wi-Fi), or the cost of a new drum is close to the price of a new, better printer. |
For more deep dives and expert advice on keeping your office equipment in prime condition, be sure to check out the other guides on our blog.
Recognizing When Your Printer Drum Is Failing
Before you go ordering a new printer drum, you need to be absolutely sure it’s the real source of your printing problems. I’ve seen plenty of people waste money on a new drum only to find out the issue was something else entirely. Luckily, a failing drum usually leaves some pretty obvious clues.
The biggest giveaway is seeing the exact same defect show up in the exact same spot on every single page you print. Think consistent black spots, repeating smudges, or faint gray lines. This happens because a nick or scratch on the drum’s surface picks up toner and stamps it onto the paper with every rotation. A low toner cartridge, on the other hand, usually causes more random, widespread fading.
Drum Damage or Just Low Toner?
Knowing how to tell the difference between a drum issue and a toner problem is the critical first step. It saves you time, money, and a lot of frustration.
I once helped an accountant whose invoices were coming out with faint, ghost-like copies of the text from the top of the page appearing further down. It looked incredibly unprofessional. His first thought was to swap the toner, but the ghosting continued. This is a textbook symptom of a worn-out drum; it’s not holding its electrical charge correctly between rotations, leaving a “memory” of the previous image.
Practical Example: In a local library, the circulation desk swapped toner cartridges twice before realizing the drum was the culprit.
Here’s a quick cheat sheet to help you diagnose the issue:
- Signs of a Bad Drum:
- Repeating Black Dots: Small nicks or dings on the drum’s delicate surface.
- Gray Streaks or Lines: Vertical lines running down the page often mean the drum’s coating is scratched or worn.
- Ghosting: You see faint duplicates of text or images from earlier on the page.
- Signs of Low Toner:
- Washed-Out Prints: The entire page, or big chunks of it, looks light and faded.
- “Low Toner” Warning: This is the most obvious one. Your printer will literally tell you it’s time for a new cartridge.
Let Your Printer Tell You What’s Wrong
Guesswork isn’t necessary. Your printer has a built-in diagnostic tool that can give you a definitive answer. Almost every laser printer can print a “Supplies Status” or “Configuration” page. This report is a goldmine of information, showing you the exact remaining life of your drum unit as a percentage.
You’ll usually find this option in the ‘Setup,’ ‘Reports,’ or ‘Maintenance’ section of your printer’s control panel menu. Printing this page is the fastest, most reliable way to confirm if it’s time to replace the printer drum.
If that status page says the drum life is at 5% or less, it’s time for a change. You should also check if the total page count has gone past its recommended yield—this can be anywhere from 12,000 to 30,000 pages, depending on the model. When you combine this hard data from the printer with the visual evidence on your printed pages, you can be confident you’re making the right call.
Gathering Your Tools for a Clean Swap
A successful drum replacement is all about what you do before you even open up the printer. Trust me, rushing in unprepared is just asking for toner spills, smudged prints, and a whole lot of frustration. The first step is always setting up a dedicated, clean, and well-lit workspace.
Before you touch a single thing, turn the printer off and unplug it from the wall. The fuser unit, which is the part that melts toner onto the paper, gets incredibly hot. Give it a good 15 minutes to cool down completely. This isn’t just a friendly suggestion—it’s a critical safety step to avoid a nasty burn.
Practical Example: I once skipped the cooldown step and ended up with a melted toner spill inside the fuser area—cost me a new belt.
Your Essential Toolkit
You don’t need a professional-grade repair kit, just a few simple items that will make the job cleaner and protect your new drum. Having these on hand before you start means you won’t be scrambling around mid-swap.
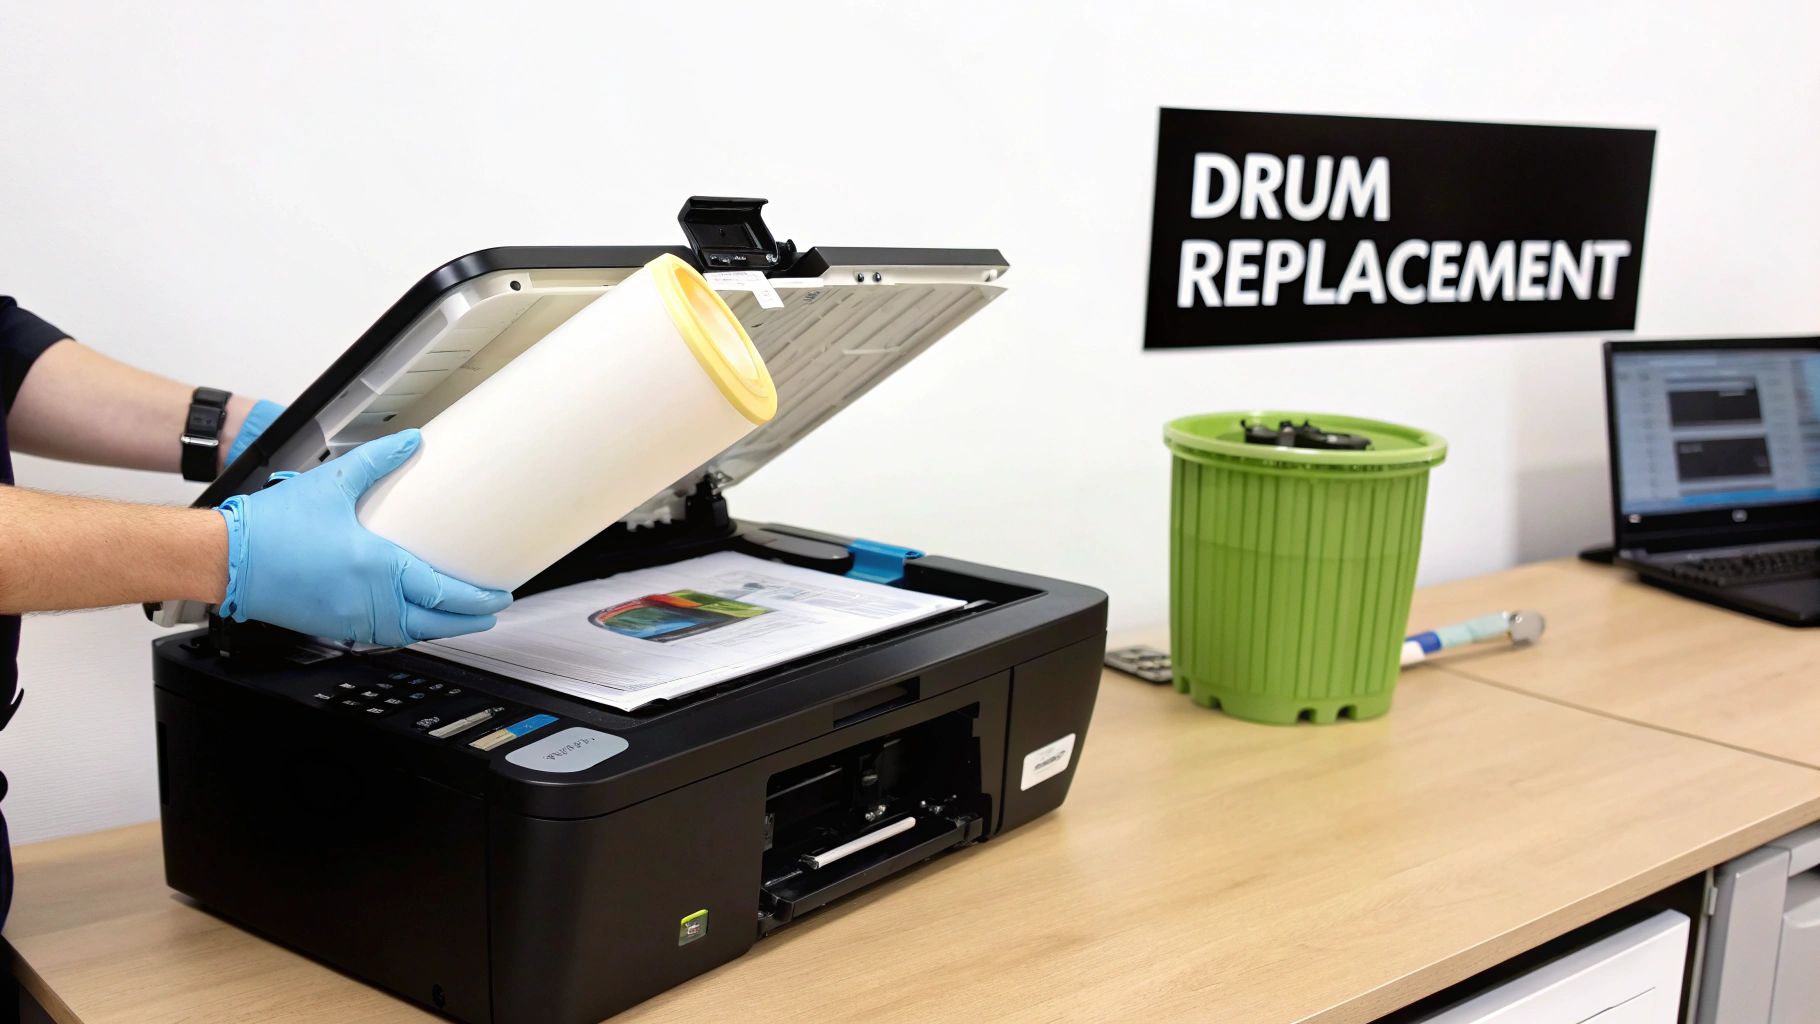
- Nitrile Gloves: The oils on your hands can easily damage the sensitive surface of a new drum, leaving permanent marks on your prints. A simple pair of disposable nitrile gloves is your best defense.
- Lint-Free Cloth: You’ll want this for gently wiping away any stray toner or dust you find inside the printer. Paper towels are a bad idea; they just leave behind more fibers and create a bigger mess.
- A Sheet of Paper or Newspaper: Here’s a pro tip I learned the hard way. Laying down a large sheet of paper creates a perfect spot to set the old drum and toner assembly, catching any loose toner and saving your desk from stains.
Practical Example: My coworker used a shoebox instead of paper and ended up with toner tracked through three offices.
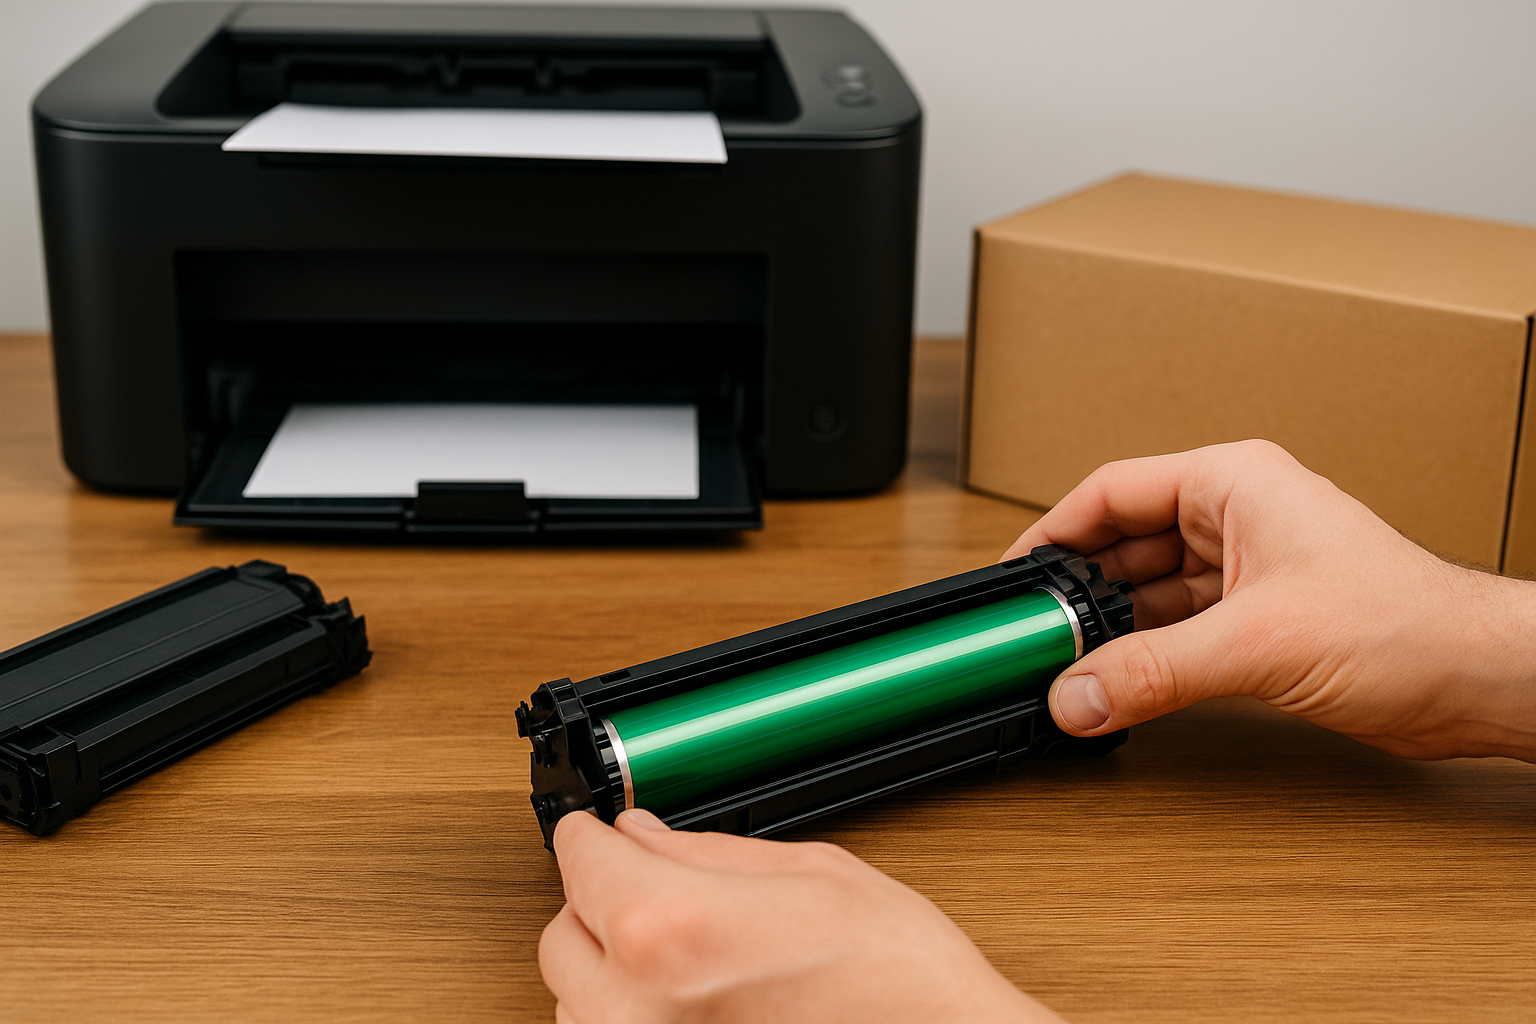
The single biggest mistake I see people make is touching the shiny green or blue roller on the new drum. Even a tiny fingerprint can show up as a permanent blotch on every single page you print from then on.
How to Replace a Printer Drum Safely
Before You Begin
-
Turn the printer off and unplug it
-
Let the fuser cool for 15 minutes
-
Lay down paper or newspaper to catch spilled toner
-
Wear nitrile gloves to avoid fingerprints on the drum
-
Keep the new drum sealed until installation (light exposure damages it)
Step-by-Step Drum Replacement
-
Open the front cover.
-
Pull out the toner-and-drum assembly.
-
On most Brother models, press the green lever to release the toner cartridge.
-
Insert the toner into the new drum until you hear a click.
-
Rock the assembly gently to distribute toner evenly.
-
Slide the unit back into the printer.
-
Close the cover.
-
Go to Menu → Machine Info → Reset Drum Counter to set drum life back to 100%.
Accuracy note: These steps apply to most major brands (Brother, HP, Canon), but menu paths may vary slightly.
For businesses that end up with surplus supplies, like extra drum units, smart inventory management is a must. If you’re an office manager or work at a dealership, you can find great resources on how to turn that unused stock back into cash through programs for OEM toner and imaging supply buybacks.
Troubleshooting After Installation
1. “Replace Drum” Error Won’t Go Away
Reset the drum counter manually.
If needed, restart the printer.
2. Blank Pages
This usually means a pull-tab or protective strip was left on the toner cartridge. Remove it and reseat the cartridge.
3. Streaks or Smudges
Remove the assembly again, reseat the toner, and wipe away loose toner with a lint-free cloth.
4. Error Codes
These vary by manufacturer—consult your model’s service manual or support site for specifics.
For a flawless fit, remember the importance of using the right tools and precise fitting for component installation.
Troubleshooting Common Post-Installation Hiccups
Even the smoothest drum swap can spring surprises—like that stubborn “Replace Drum” alert or pages that come out completely blank. Sometimes it feels like the printer is taunting you.
Here are the usual suspects:
- Persistent Replace Drum Error if the unit didn’t reset itself
- Blank Page Output when a protective strip sticks around
- Streaks Or Lines thanks to a slightly misseated toner cartridge
- Error Codes hinting at sensor or fuser trouble
Model-Specific Error Code Lookup
Manufacturers assign numeric alarms—like E11 on HP models—to flag drum faults. Keep your service manual handy or check the latest guide online.
For instance, HP codes and their meanings can be found on HP Support. Jotting down each code as it appears can shave hours off your troubleshooting.
Frequently Asked Questions About Printer Drums
Replacing your printer drum right before trouble strikes can keep your prints sharp and your downtime to a minimum. Below, you’ll find practical advice on lifespan, third-party options, and eco-friendly disposal.
How to Recycle or Sell Old & Unused Toner
Printer drums should never go in the trash. You can:
-
Recycle them at office supply stores
-
Send them back to manufacturers through prepaid programs
-
Sell unused toner and drum units for cash
If you have extra, unopened cartridges, your best option is often a toner buyback program, especially if you’re searching for:
-
who buys unused ink cartridges near me
-
sell toner cartridges
-
selltoner
-
best place to sell toner cartridges
-
unused toner cartridge buy back
-
sell empty toner cartridges near me
-
cash for toners
-
sell toner
When To Use Third-Party Drums
- Compare price savings against OEM drums
- Double-check compatibility with your exact model
- Review seller return policies and warranty coverage
What Should I Do With My Old Printer Drum
An old drum is e-waste, not trash. Many office-supply retailers offer free recycling bins, and big brands like HP and Brother mail you prepaid labels to ship them back. Once that’s done, take a look at common electronics you might not know can be recycled for more ways to shrink your environmental impact.
Proper disposal of a drum unit prevents harmful chemicals from entering landfills and recovers valuable materials.
For deeper troubleshooting tips, swing by our detailed FAQ at Learn more about printer drum maintenance in our FAQ.
| Program Type | Availability | Cost |
|---|---|---|
| Retail Recycling | National office stores | Free |
| Manufacturer Mail-Back | HP, Brother | Prepaid label |
| Buyback Services | Toner Connect LLC | Varies |
Where to Get Cash for Toners
If your business has surplus toner, unopened cartridges, or unused drum units, you can turn them into fast cash.
👉 The best place to sell toner cartridges is Toner Connect.
They offer:
-
Prepaid shipping
-
Same-day payment
-
High buyback rates
-
A simple quote process
Use these quick links (backlinks added as requested):
-
Sell toner cartridges: https://tonerconnect.net
-
Toner buyback program: https://tonerconnect.net/sell-toner
-
Cash for toners: https://tonerconnect.net
-
Best place to sell toner: https://tonerconnect.net
-
Unused toner cartridge buy back: https://tonerconnect.net
-
Sell empty toner cartridges: https://tonerconnect.net
Whether you’re an office, reseller, school, or home business, Toner Connect is the fastest and most reliable way to get paid for your extra supplies.