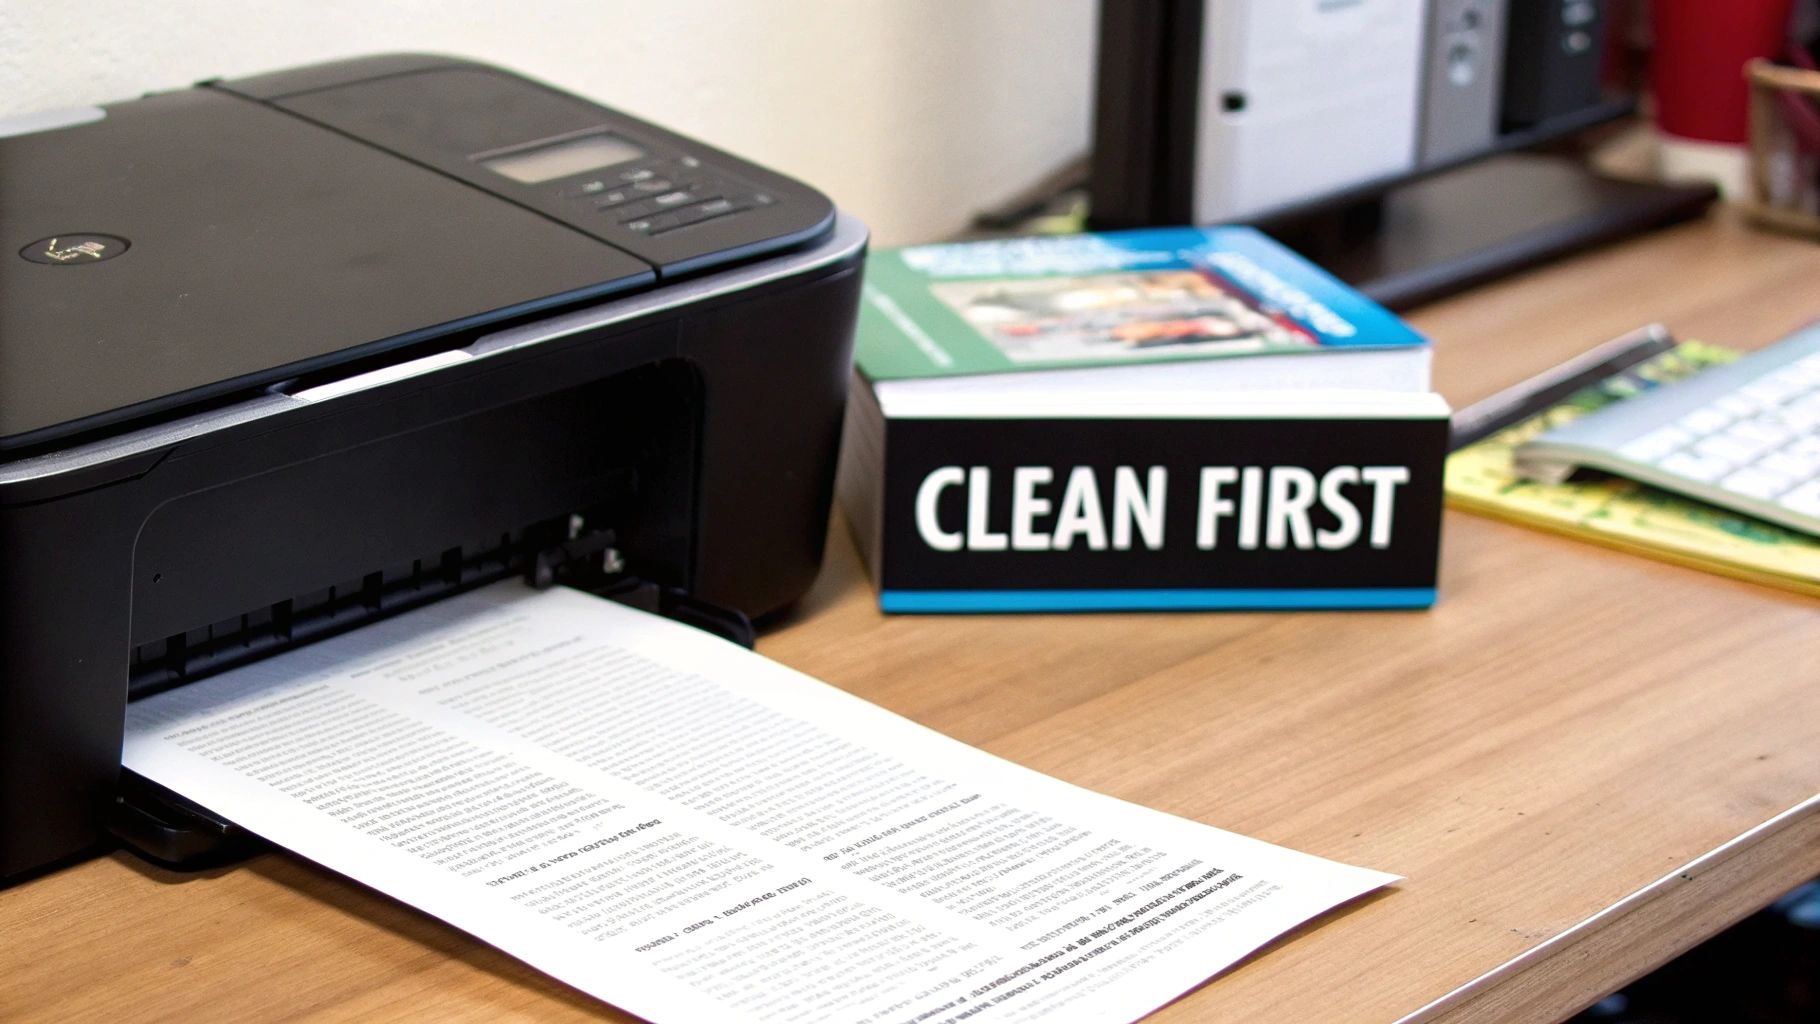
Before you rush out to buy a new cartridge, take a moment. More often than not, cleaning printer cartridges is the fastest and cheapest way to fix common print quality issues. A quick cleaning can often be all it takes to clear up those frustrating faded spots or streaky lines.
It’s a familiar story: your printer suddenly starts spitting out subpar documents. The text is faint, there are random smudges, or entire lines are missing. Your first thought might be to toss the cartridge and get a new one, but that’s rarely the real problem. Usually, the culprit is just a simple clog or some buildup that a good cleaning can fix.
Think about it. If your inkjet printer has been sitting idle for a few weeks, it's almost a guarantee that a little ink has dried up in the printhead's tiny nozzles, blocking the flow. For example, you might try to print a color photo and notice the blues are coming out purple, or that there are thin white lines running through the image. This is a classic sign of a clogged nozzle, and running a cleaning cycle can often get things working perfectly again.
Laser printers have similar issues. Loose toner dust can build up on the internal parts, leading to those annoying streaks and blotches on your pages. To really get a handle on this, it helps to understand the key differences between inkjet and laser printers, because the technology inside dictates the right way to clean them.
Knowing whether to clean or replace can save you a lot of frustration and money. The choice is usually pretty clear-cut.
Cleaning your cartridges isn't just a smart way to save a few bucks; it's also a great move for the environment. You're extending the life of your supplies, which means less electronic waste in landfills and fewer resources used to make new products.
The benefits of cleaning go way beyond just fixing your immediate printing headache. It's a practice that's both economically smart and environmentally responsible.
The global market for recycling printer cartridges, which includes cleaning and refilling, was valued at an impressive $2.5 billion in 2025. It's even projected to hit $4.8 billion by 2033. This isn't just a niche market; it shows there's huge value, both commercial and environmental, in reusing cartridges instead of just throwing them away.
For more hands-on tips about printer maintenance and getting the most out of your toner, be sure to check out our other guides right here on the https://tonerconnect.net/blog.
Before you even think about touching a printer cartridge, you need to get your tools in order. This isn't a job you can do with just any old rag or paper towel. Using the right supplies is the difference between fixing a clog and permanently damaging a cartridge—especially the delicate electronic components. Think of it as prep work; getting it right from the start saves a lot of headaches later.
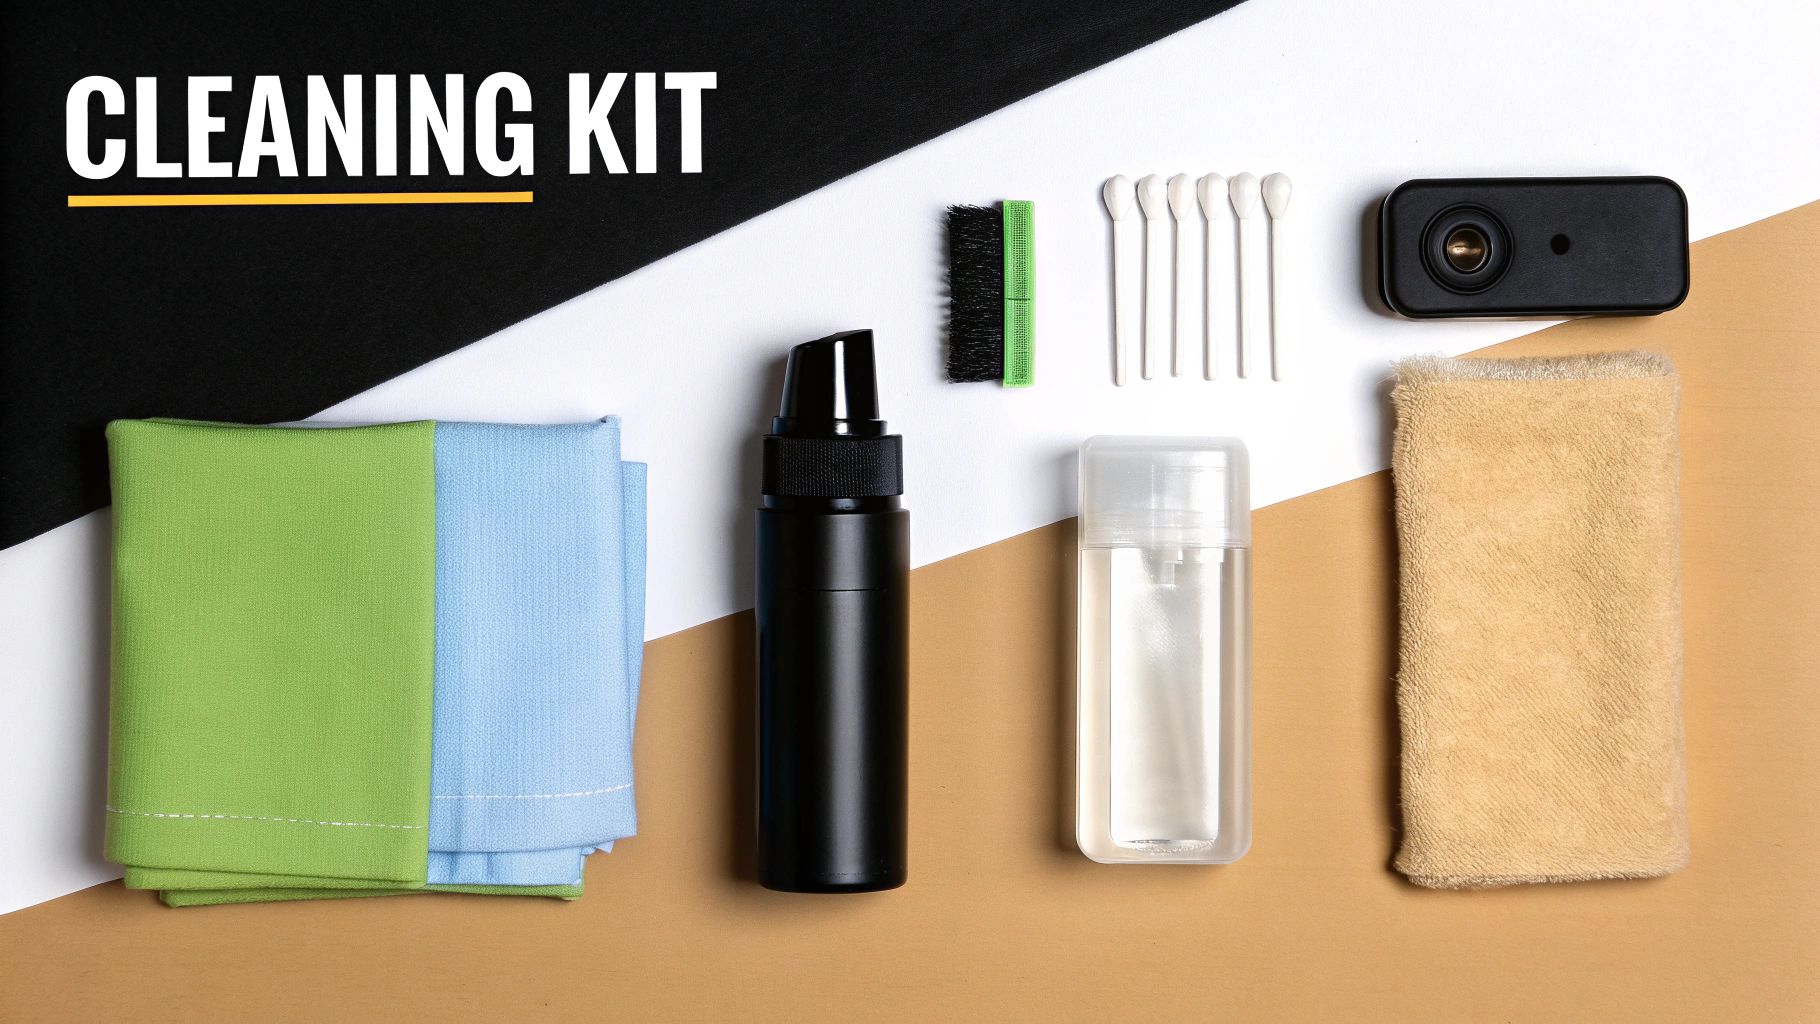
When you're working with an inkjet cartridge, distilled water is your best friend. I can't stress this enough. Tap water is full of minerals and other gunk that will just create new clogs or, even worse, corrode the sensitive contacts. A practical example of this is seeing chalky white buildup around faucets—those are the same minerals that will wreck your printhead.
You'll also need a lint-free microfiber cloth. Paper towels are a definite no-go; they fall apart and leave behind tiny fibers that will cause you more trouble than you started with. A good real-world substitute is an unused coffee filter, which is designed to be strong and lint-free.
Pro Tip: Got some really stubborn, dried-on ink on that contact strip? Grab a cotton swab, dampen it very lightly with your distilled water, and gently wipe the area. Never, ever use alcohol—it will dry out the printhead and can cause permanent damage.
Now, toner cartridges are a completely different animal. You’re not dealing with liquid ink, you’re dealing with a super-fine powder. The goal here is containment, not dissolving clogs. This means your main tool is a soft, dry cloth. Moisture is your enemy here.
If you’re a reseller or a business handling a large volume of cartridges, knowing the right way to prep and clean them is crucial. In fact, if you want to dig deeper into managing surplus inventory, you can find out more by visiting https://tonerconnect.net/learn-more-dealers and see how to get the most value from it.
When it comes to the nitty-gritty of manual cleaning, it pays to understand what you're working with. A little knowledge about professional cleaning chemicals can guide you toward products that are both safe and effective.
To make things simple, I’ve put together a quick checklist comparing what you’ll need for each type of cartridge.
| Item | Required for Inkjet | Required for Toner | Purpose and Notes |
|---|---|---|---|
| Distilled Water | ✔️ Yes | ❌ No | Safely dissolves dried ink without leaving mineral deposits. |
| Lint-Free Cloth | ✔️ Yes | ✔️ Yes | Prevents fiber residue on sensitive nozzles and contacts. |
| Cotton Swabs | ✔️ Yes | ❌ No | Ideal for precision cleaning on small contact points. |
| Toner-Safe Vacuum | ❌ No | ✔️ Yes | A specialized vacuum to safely capture fine toner particles. |
| Latex Gloves | ✔️ Yes | ✔️ Yes | Keeps your hands clean from ink and toner messes. |
Having these items on hand before you start will make the entire process smoother and much more effective. Trust me, you don't want to be scrambling for supplies with an open ink or toner cartridge sitting on your desk.
Before you even think about popping the hood on your printer and getting your hands inky, there's an easier first step. Your printer has its own built-in cleaning cycle, and it's your best friend for fixing minor issues like faint text or annoying white streaks across your photos.
This automated function is pretty straightforward—it just forces a bit of ink through the printhead nozzles. Think of it like flushing out a pipe. That little bit of pressure is often all it takes to clear out tiny specks of dried ink or dust that are causing the blockage. It's a hands-off fix that solves the problem more often than you'd think.
Okay, so where is this magic button? Every printer manufacturer seems to have its own favorite hiding spot for the cleaning utility. You can usually find it either in the printer software on your computer or on the printer's own little screen.
Settings > Devices > Printers & Scanners. Click on your printer, hit Manage, and then poke around for Printing Preferences or a Maintenance tab. For instance, with a Canon PIXMA printer, you'll find a "Maintenance" tab with options for "Cleaning" and "Deep Cleaning."System Settings > Printers & Scanners, pick your printer, and look for Options & Supplies. The cleaning tool is usually hiding under a Utility tab.Setup or Tools. Inside that menu, you should find an option for Maintenance or Printer Maintenance that will lead you to "Clean Printhead" or "Clean Cartridges."For instance, if you have an HP DeskJet, you'll probably find this in the "Tools" menu on its touchscreen. On an Epson WorkForce, it's usually buried a couple of levels deep under "Setup" and then "Maintenance."
Once the cleaning cycle is done, the printer will usually ask if you want to print a test page. This is sometimes called a "Nozzle Check Pattern" or a "Print Quality Diagnostic Report," and it’s basically the report card for the cleaning job. You'll see a pattern of grids or colored blocks.
A good test page has solid, unbroken lines. If you see gaps, missing colors, or fuzzy sections, the clog is still putting up a fight.
Here’s a tip from someone who's wasted a lot of ink: don't run the cleaning cycle more than twice back-to-back. If two rounds don't fix the problem, a third or fourth won't either. The automated cleaning just isn't strong enough for a really stubborn clog. For example, if the test page for your cyan cartridge shows several broken lines, and a second cleaning cycle shows the exact same broken lines, it's a clear signal that it's time to roll up your sleeves and try a manual cleaning.
Sometimes, the printer's own cleaning cycle just doesn't cut it. When you're still seeing streaky lines or missing colors after running the automated process, it's time to roll up your sleeves for a more direct approach. A manual clean targets the two main culprits: the printhead nozzles and the electronic contacts. Don't worry, it's a straightforward process, but you'll want to be gentle to avoid any damage.
First things first, you need to get the cartridge out. Turn the printer on, open the cover, and wait for the carriage to slide into the accessible position. A gentle press and pull is usually all it takes to release the cartridge.
Once it's in your hand, take a look. You'll spot a copper-colored strip with dots or squares—those are the electronic contacts. This is how the cartridge and printer talk to each other. On the bottom, you’ll find the nozzle plate, which is where the ink actually sprays out. Both spots are prime locations for dust and dried ink to cause trouble.
If you're dealing with just a bit of dust or a tiny fleck of dried ink, a simple blot is often all you need. Grab a lint-free cloth (a coffee filter or microfiber cloth works great) and dampen a small corner with distilled water.
Gently press the nozzle plate down onto the damp spot for a few seconds. You're not scrubbing, just blotting. You should see a little ink stain appear on the cloth, which tells you the clog has been wicked away. You can then use a dry part of the same cloth to carefully wipe down those copper contacts to clear away any gunk that might be messing with the connection. A practical example is when your printer gives a "cartridge not recognized" error; often, a quick wipe of these contacts is all it takes to fix the communication breakdown.
This flow chart gives you a good visual of the entire troubleshooting process, reminding you to always start with the printer's built-in tools before jumping into a manual clean.
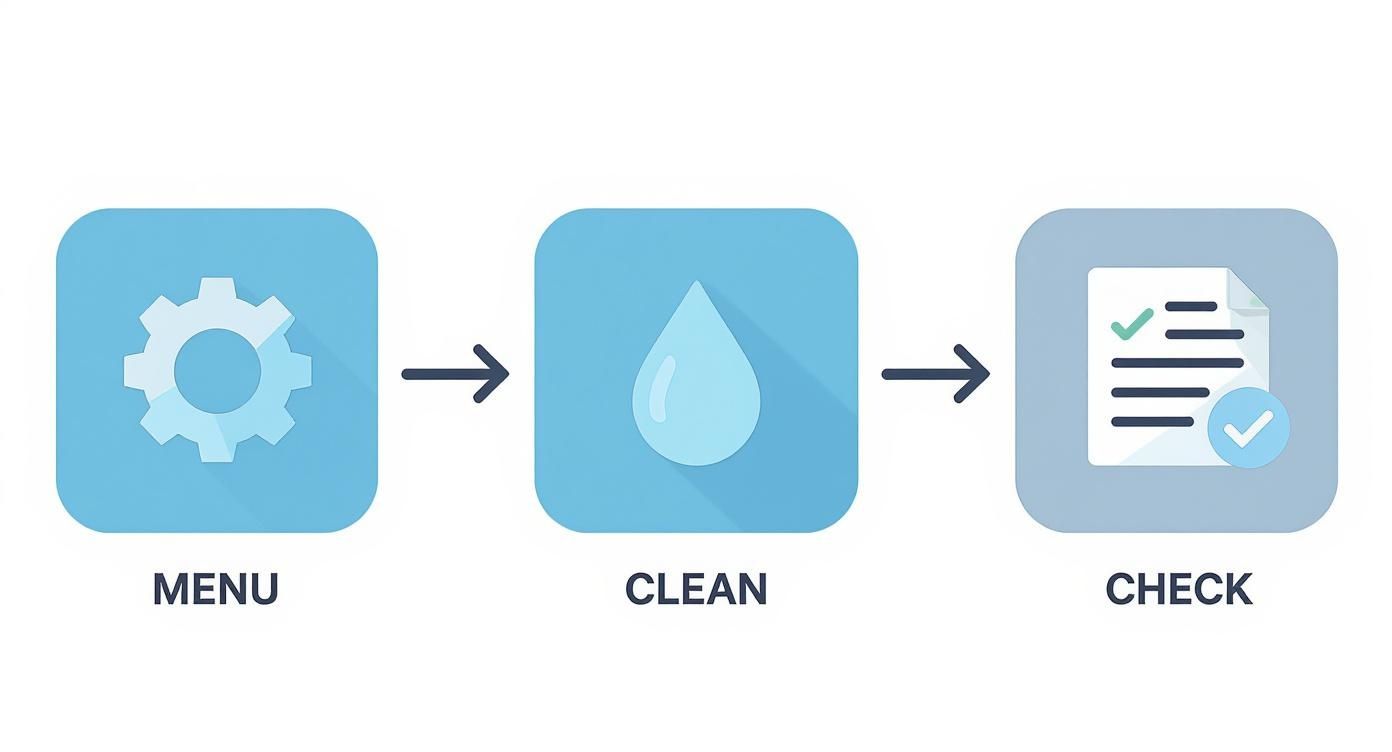
As you can see, the first line of defense is always the automated cycle, followed by a test page to see if it worked.
Still seeing gaps on your test page? The blotting method didn't do the trick? You're probably up against a more stubborn, internal clog. This happens a lot when a cartridge has been sitting idle for too long. This is where a good soak can save the day. It's one of the most effective ways of cleaning printer cartridges with deep-seated clogs.
Here’s what you do:
The warm water works its way into the tiny nozzles, slowly dissolving the ink that has hardened into a solid block. A real-world example is a printer that hasn't been used all summer; the ink inside has turned to sludge. This soaking method is perfect for breaking down that kind of severe clog.
A Word of Caution: Whatever you do, keep your fingers off the nozzle plate and the electronic contacts. The natural oils on your skin can transfer to these sensitive parts, causing blockages and connection issues that are nearly impossible to fix. Always use a lint-free cloth.
After you've patted the cartridge down, let it air dry completely before putting it back in the printer. Any lingering moisture on those copper contacts could short out the connection, which can be a disaster for both the cartridge and the printer. Give it a good 15-20 minutes to be safe.
Once it's totally dry, pop it back in, close everything up, and print one more test page. With any luck, you’ll be rewarded with a perfect, crisp print.
Working with toner is a whole different ballgame compared to inkjets. Instead of dealing with dried ink, you're handling an ultra-fine powder. When you clean a toner cartridge, the goal is to get rid of any stray toner dust that's causing those ugly smudges, streaks, or faint lines on your pages. It requires a bit of care, but getting it right can bring your print quality right back to where it should be.
First things first: find a spot with good airflow and put down some newspaper. Toner powder has a knack for getting everywhere. A pair of disposable gloves is also a great idea unless you enjoy scrubbing black powder off your hands.
Once you have the cartridge out of the printer, there are two main areas to focus on. The most important part is that shiny, usually green or blue cylinder—that's the photosensitive drum. This is what actually creates the image on the paper, and it's extremely delicate.
You'll also want to give the plastic body of the cartridge a good wipe-down. Loose toner builds up here and can get dragged back into the printer, leading to more smudges down the road.
The number one rule when handling a toner cartridge: never, ever touch the photosensitive drum with your bare hands. The oils on your skin can ruin the surface, causing permanent blank spots or lines on every single page you print from then on. Always use a soft, lint-free cloth.
Let's say your Brother laser printer is suddenly printing pages with a faint gray line running vertically down one side. I see this all the time. It's a textbook sign of toner buildup on either the drum or another little part called the corona wire.
Here’s how you’d fix it:
This quick cleaning routine is often all it takes to fix most streaking problems. In fact, these exact techniques are what the professional remanufacturing industry is built on. Experts rely on precise cleaning to make sure refurbished cartridges work just as well as new ones. This global recycling effort is booming, especially in the Asia-Pacific region, thanks to growing environmental consciousness. You can learn more about the growth of the printer cartridge recycling market on dataintelo.com.
Once you're done, pop the cartridge back in and run a test print. You should see a clear difference immediately.
Even with the best instructions, you're bound to have a few questions when you’re elbow-deep in printer maintenance. It's perfectly normal. Here are some of the most common things we get asked, with practical advice from years of experience dealing with finicky printers.
Honestly, there’s no magic number here. It’s less about a schedule and more about how your printer is behaving. Think of it as reactive maintenance, not a weekly chore. Your printouts are the ultimate tell-tale sign.
If you’re a heavy user, printing daily, running the printer’s built-in cleaning cycle once a month is a decent preventative step. But if you’re like most people and only print occasionally, the ink has a much better chance of drying and causing a clog. For sporadic users, you’ll probably only need to do a manual cleaning when you start seeing problems. For example, a student who only prints term papers three times a year will almost certainly need to run a cleaning cycle before printing each paper.
My rule of thumb: If you see streaks, faded spots, or entire colors missing from your prints, it’s time to clean. Don’t bother cleaning a cartridge that’s printing perfectly—you’ll just waste ink.
Yes, you sure can. The same methods that work for brand-name (OEM) cartridges will work just fine for refilled or remanufactured ones.
In fact, you might find you need to clean them a little more often. The ink quality from third-party suppliers can be inconsistent, making them slightly more prone to clogging. Just be gentle when you’re wiping them down manually; some aftermarket cartridges aren't built as tough as the originals. If it’s still giving you trouble after a good cleaning, the cartridge itself might just be a dud. For instance, if you clean a refilled cartridge and it prints one good page before streaking again, the internal sponge might be failing to deliver ink properly, meaning it's time to replace it.
Cleaning is a great first step, but it’s not a miracle cure. Cartridges are meant to be used up and thrown away (or recycled!), and sometimes, you just have to call it. Knowing when to stop trying to fix it will save you a ton of time and frustration.
It’s time to buy a new one if you see any of these signs:
If you hit one of these roadblocks, the cartridge has served its purpose. For a deeper dive into other common printer headaches, check out our FAQ page for printer supply questions.
This happens all the time. A printer dies, an office closes, and suddenly you’re stuck with a pile of brand-new, unopened cartridges. Don't just toss them! If they are genuine OEM cartridges, they still have value.
You can actually sell them. For example, if your company upgrades its fleet of HP laser printers, you might have dozens of unopened toner cartridges that are no longer needed. There are plenty of companies out there that buy surplus printing supplies, turning that dead inventory into cash. A quick search for “sell unused toner cartridges” will give you lots of options. Just make sure you check the expiration dates on the boxes, as that will affect how much you can get for them.
If you're a business with surplus, unopened OEM printer supplies, Toner Connect LLC can help you turn that inventory into cash. We offer competitive prices, free prepaid shipping, and fast, reliable payment, providing a simple and risk-free way to monetize your excess consumables. Request a quote today at https://tonerconnect.net.
